Rendering

We made it! You guys did awesome animating and now it’s time to render it out and edit this thing together! Please follow the following instructions to make sure you render everything with the same setup as everyone else:

VERY IMPORTANT NOTE:

1) SELECT YOUR CAMERA AND OPEN THE ATTRIBUTE EDITOR (CTRL + A).
2) SET THE Far Clip Plane TO 10000.00.

DOING SO WILL ENSURE THAT YOUR CAMERA WILL SEE ALL OF THE STARS IN THE DISTANT STARFIELD.

Render Settings:

1) Select your camera window.
2) Open your render settings by choosing: Window > Rendering Editors > Render Settings or by pressing the Render Settings icon.
3) Under Image File Output, name the File name prefix “Shot[your shot number]” example “Shot26”.
4) Under Frame/Animation ext, if it isn’t already, choose name.#.ext from the dropdown menu.
5) Make sure the image format is set to TIFF.
6) Set the Start Frame to 1.000 and the End frame to the last frame in your animation.
7) Keep By Frame at 1.000.
8 ) Set Frame Padding to the appropriate value for the length of your shot. Unless you have 1000 frames or more, this number should be 3.
9) Under Renderable Cameras, make sure your Renderable Camera is set to your shot camera, if you followed the Camera Setup blog post precisely, this camera is called theCamera.
10) Check both the Alpha channel (Mask) and Depth channel (Z depth) checkboxes.

The rest of your render settings should be correct by default.

11) In the Rendering menu set, Choose Render > Batch.

GIVE ME YOUR FINAL RENDER IMAGE SEQUENCE!

What to do with those Z-Depth files that render with your TIFF Image Sequence of your shot:

When your shot is finished rendering, you will notice that there are two image sequences in your folder. One is your TIFF Image Sequence of your actual render, the other is a Maya IFF sequence that has file names such as Shot35.01_Depth.iff. This is your Z-Depth image sequence we’ll be using to add depth of field to our shots in post.

1) Sort your folder by file type to separate the image sequences.
2) Move all of the Z-Depth image files into a separate folder that you will send to me along with your Quicktime Render.
3) Follow the above instructions for creating your QT file.
4) Send to me ASAP!

Then call me to arrange retrieval of your finished shot files or put them on one of the Macs in the DA lab and call me to confirm that they are finished rendering.
Instructions for Final Playblasts

Okay, some of you are at the point with your shots where I’ve signed off on your animation, and you’re ready to submit a final playblast for editing and start rendering. Here’s what I need you to do for each of your shots:

1) Be sure to select the window you are viewing your camera through, otherwise you’ll playblast something else, like your perspective camera. (NOTE: IF YOU ARE STILL FRAMING YOUR SHOT WITH THE PERSPECTIVE CAMERA, PLEASE SEE THE FOLLOWING POST: Maya Animation Camera Setup)

2) In you camera window, Choose Lighting > Use All Lights.
3) Choose Show > None. Then Show > Polygons.

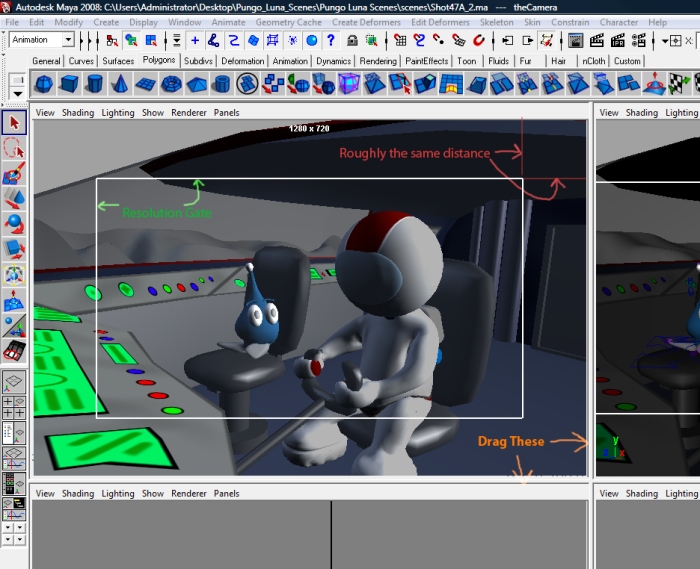
4) In order to render out a playblast with roughly the same aspect ratio as a 720HD image, drag around the horizontal and vertical borders in 4-Up view until the distance between the resolution gate and the window borders is roughly equal all the way around.

maya

5) Choose Window > Playblast [] (little box).

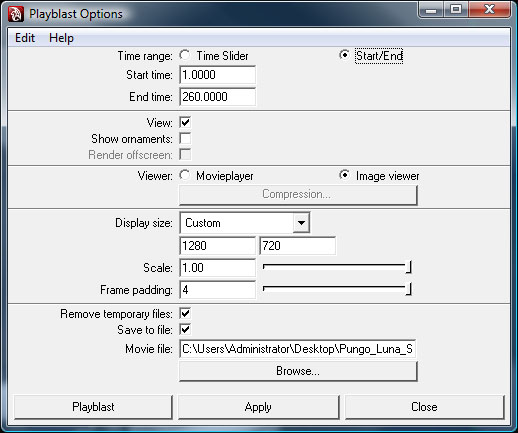
6) Configure your Playblast Options like the following image, creating an image sequence. Update the Start and End times from 1.000 to the end of your animation. You can set a lower frame padding if you don’t have 1000 frames, but it doesn’t really matter. Set up and choose a folder to save your image sequence to. Hit Playblast.

Configure your playblast options according to these settings, updating as necessary.

Configure your playblast options according to these settings, updating as necessary.

7) If you have Quicktime Pro, open your image sequence and choose File > Export.
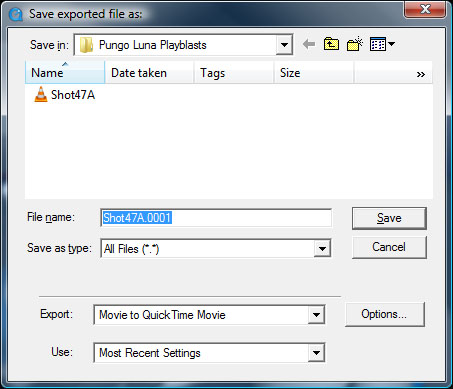
8) Name your File name, Shot[your shot number here] (example: Shot47) and Hit Save.

export

When it finishes saving, put it on a DVD or hard drive and get it to me ASAP. I need to start forming up the edit as soon as I possibly can. Following these steps will help me, Cory, and Peter tremendously as we move Pungo Luna into post-production.

You all have done an amazing job so far. I’m really impressed with your ability to animate, and your cooperation as I’ve continued to give you endless criticism on your shots has been impeccable! For that, I sincerely thank you!

Maya Animation Camera Setup

The best way to work with your camera for establishing your framing in Maya is to:

1) Create a new camera and WITHOUT MOVING IT, select it and group it twice.
2) Name the top-level group “TRANSLATE” and lock and hide all the Scale, Rotate, and Visibility attributes
3) Name the second level group “ROTATE” and lock and hide all the Scale, Translate, and visibility attributes
4) Rename the Camera something simple like “theCamera” and lock all of it’s attributes.
5) Once you have your new camera set up, move it with the TRANSLATE group to the location and rotate it into place.
6) In the 4-up view, click in the “Top” window and choose from the menu I think it’s “Panel” (the last menu item) and Look through selected…
7) Then you can move the camera with it’s controls in the persp window and watch how the frame changes in the theCamera window.

NOTE***: DO NOT AT ALL USE THE NORMAL CAMERA MOVE MOUSE CONTROLS LIKE SCROLLING OR ALT + CLICK AND DRAG, ETC. WHILE HAVING YOUR NEW CAMERA WINDOW SELECTED, YOU WILL BREAK THE WHOLE SETUP AND HAVE TO DO IT ALL OVER AGAIN!!!!

If you want to be able to rotate the camera around a central focal point:

1) Select the ROTATE group node in the Outliner
2) Hit Ctrl (Cmd) + G to group it
3) Rename the group FOCAL_POINT
4) Set what you want the focal point to be by hitting Insert to move the pivot point for the FOCAL_POINT group node to the desired point
5) Lock and hide the Scale, Translate, and visibility attributes

Doing this makes animating and positioning the camera much easier to use, and allows you to establish your framing and still move around the scene with the perspective camera in order to animate everything properly.